Setting up a Windows VPS server can seem daunting, but with the right guidance, you’ll have your server running smoothly in no time. This comprehensive guide walks you through every step of the Windows VPS setup process, from initial purchase to security configuration and deployment.
What is a Windows VPS Server?
A Virtual Private Server (VPS) running Windows is a virtualized server environment that provides dedicated resources within a shared physical server. Unlike shared hosting, a Windows VPS gives you root access, dedicated RAM, CPU cores, and storage, allowing you to install applications, configure settings, and manage your server independently.
Key benefits of Windows VPS hosting include:
- Full administrative access with Remote Desktop Protocol (RDP)
- Ability to run Windows-specific applications like ASP.NET, MSSQL, and IIS
- Scalable resources that grow with your needs
- Cost-effective alternative to dedicated servers
- Familiar Windows interface for easy management
Prerequisites Before Setting Up Your Windows VPS
Before diving into the setup process, ensure you have the following:
- A Windows VPS plan from a reputable provider (Vultr, DigitalOcean, AWS, Azure, or Linode)
- Your VPS IP address, username, and initial password (provided by your hosting provider)
- A stable internet connection
- Remote Desktop Connection software (built into Windows, or downloadable for Mac/Linux)
- Basic understanding of Windows Server administration
Step 1: Choose the Right Windows VPS Provider
Selecting the right VPS provider is crucial for performance, reliability, and support. Consider these factors when making your decision:
Performance considerations:
- Server location (choose data centers closest to your target audience)
- Hardware specifications (SSD storage, modern CPUs)
- Bandwidth allocation and network speed
- Guaranteed uptime SLA (aim for 99.9% or higher)
Popular Windows VPS providers:
- Microsoft Azure: Best for enterprise-level deployments and Azure service integration
- Amazon Web Services (AWS): Highly scalable with extensive global infrastructure
- Vultr: Budget-friendly with straightforward pricing
- DigitalOcean: Developer-friendly with excellent documentation
- Linode: Strong performance-to-price ratio
Pricing models: Most providers offer hourly or monthly billing. Windows VPS typically costs more than Linux due to licensing fees. Expect to pay $10-50/month for entry-level plans and $100+ for high-performance configurations.
Step 2: Deploy Your Windows VPS Instance
Once you’ve selected a provider, follow these general steps to deploy your server:
Creating Your VPS Instance
Log into your hosting provider’s control panel and navigate to the server creation section. During setup, you’ll need to configure:
Server specifications:
- Choose your Windows Server version (Windows Server 2019 or 2022 recommended)
- Select CPU and RAM (minimum 2GB RAM for basic applications)
- Pick storage capacity (start with at least 50GB SSD)
- Choose your server location
Authentication setup: Most providers allow you to set an administrator password during deployment. Create a strong password with at least 12 characters, including uppercase, lowercase, numbers, and special characters.
Deployment time: Windows VPS deployment typically takes 2-5 minutes. Your provider will send you the connection details via email, including:
- Server IP address
- Username (usually “Administrator”)
- Initial password
- Remote Desktop Protocol (RDP) port (default is 3389)
Step 3: Connect to Your Windows VPS via Remote Desktop
Remote Desktop Protocol (RDP) is the primary method for accessing and managing your Windows VPS.
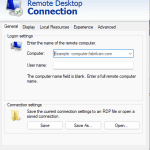
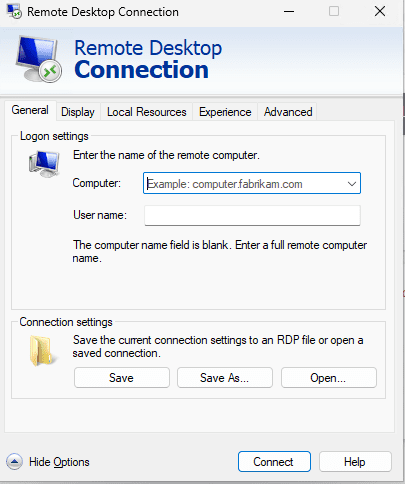
Connecting from Windows
On your local Windows computer, access Remote Desktop Connection:
- Press Windows Key + R to open the Run dialog
- Type “mstsc” and press Enter
- Enter your VPS IP address in the Computer field
- Click “Show Options” for additional settings
- Enter “Administrator” as the username
- Click “Connect” and enter your password when prompted
Pro tip: Save your connection settings by clicking “Save As” under the General tab for quick future access.
Connecting from Mac
Mac users need Microsoft Remote Desktop from the App Store:
- Download and install Microsoft Remote Desktop from the Mac App Store
- Click “Add PC” or the + icon
- Enter your VPS IP address under “PC name”
- Set User Account to “Administrator” with your password
- Click “Add” and double-click the connection to connect
Connecting from Linux
Linux users can use Remmina or rdesktop:
# Install Remmina on Ubuntu/Debian
sudo apt-get update
sudo apt-get install remmina remmina-plugin-rdp

# Or use rdesktop from command line
rdesktop -u Administrator -p your_password your_vps_ip
Troubleshooting Connection Issues
If you cannot connect to your VPS:
- Verify the IP address is correct
- Ensure RDP port 3389 is open in your firewall
- Check if your ISP blocks outbound RDP connections
- Try connecting from a different network
- Contact your VPS provider’s support team
Step 4: Initial Windows Server Configuration
After successfully connecting, perform these essential first-time configurations:
Change the Administrator Password
Your first action should be changing the default password:
- Press Ctrl + Alt + End (equivalent to Ctrl + Alt + Delete on local machines)
- Select “Change a password”
- Enter your current password and create a new strong password
- Store this password securely in a password manager
Set Your Server Name
Give your server a recognizable name:
- Right-click on “This PC” or “Computer” and select “Properties”
- Click “Change settings” next to the computer name
- Click the “Change” button
- Enter your desired computer name
- Click OK and restart the server when prompted
Configure Windows Updates
Keeping your server updated is critical for security:
- Open “Settings” from the Start menu
- Navigate to “Update & Security”
- Click “Windows Update”
- Click “Check for updates”
- Install all available updates
- Configure automatic updates for security patches
Best practice: Schedule updates during low-traffic periods and always create backups before major updates.
Set the Correct Time Zone
Ensure your server uses the correct time zone:
- Right-click the clock in the system tray
- Select “Adjust date/time”
- Turn off “Set time automatically” temporarily
- Select your correct time zone
- Re-enable “Set time automatically”
Step 5: Configure Windows Firewall Settings
Windows Firewall is your first line of defense against unauthorized access.
Understanding Windows Firewall Basics
Windows Firewall filters incoming and outgoing network traffic based on predefined rules. By default, it blocks most incoming connections while allowing outbound traffic.
Essential Firewall Configuration Steps
Access Windows Firewall settings:
- Open Control Panel
- Navigate to “System and Security”
- Click “Windows Defender Firewall”
- Select “Advanced settings” on the left sidebar
Allow Required Services
Configure inbound rules for essential services:
For web servers:
- HTTP (Port 80)
- HTTPS (Port 443)
For remote access:
- RDP (Port 3389) – already enabled by default
For FTP servers:
- FTP (Port 21)
- FTP Passive Ports (Port range 1024-65535 or custom range)
Creating a New Firewall Rule
To add a new inbound rule:
- Click “Inbound Rules” in the left panel
- Click “New Rule” in the right panel
- Select “Port” and click Next
- Choose TCP or UDP and specify the port number
- Select “Allow the connection”
- Choose when the rule applies (Domain, Private, Public)
- Name your rule and add a description
- Click Finish
Security recommendation: Only open ports you actively need. Regularly review and remove unused firewall rules.
Step 6: Install Essential Software and Tools
Equip your Windows VPS with necessary software for efficient management and operation.
Web Browsers
Download a modern web browser for easier software downloads and web management:
- Google Chrome
- Mozilla Firefox
- Microsoft Edge (pre-installed on Windows Server 2019+)
Web Server Software
Internet Information Services (IIS):
IIS is Windows’ native web server platform, ideal for ASP.NET applications:
- Open “Server Manager”
- Click “Add roles and features”
- Select “Role-based or feature-based installation”
- Choose your server
- Check “Web Server (IIS)”
- Click through and install
Alternative web servers:
- Apache HTTP Server
- Nginx for Windows
Database Management Systems
Install a database server based on your application requirements:
Microsoft SQL Server:
- Download SQL Server Express (free) or Developer Edition
- Run the installer
- Choose “Basic” installation for quick setup
- Note the instance name and connection details
- Install SQL Server Management Studio (SSMS) for graphical management
MySQL:
- Download MySQL Community Server from mysql.com
- Run the installer and choose “Server only” or “Full”
- Configure root password during installation
- Set up MySQL as a Windows service
PostgreSQL:
- Download from postgresql.org
- Run the installer
- Set a password for the postgres superuser
- Configure the port (default 5432)
FTP Server
For file transfers, configure an FTP server:
FileZilla Server:
- Download FileZilla Server from filezilla-project.org
- Install and launch the server application
- Create FTP users with specific permissions
- Configure passive mode port ranges
- Set up SSL/TLS for secure connections (FTPS)
Development Tools
For developers, consider installing:
- Visual Studio or Visual Studio Code
- Git for Windows
- Node.js and npm
- .NET Framework and .NET Core
- Programming language runtimes (Python, PHP, etc.)
System Monitoring Tools
Track server performance and health:
- Process Explorer (Microsoft Sysinternals)
- Performance Monitor (built-in)
- Resource Monitor (built-in)
- Third-party monitoring solutions (DataDog, New Relic)
Step 7: Implement Security Best Practices
Security should be your top priority when running a Windows VPS.
Create Additional User Accounts
Never use the Administrator account for daily operations:
- Open “Computer Management”
- Expand “Local Users and Groups”
- Right-click “Users” and select “New User”
- Create a user with a strong password
- Add the user to appropriate groups
- Use this account for regular tasks
Disable Unnecessary Services
Reduce your attack surface by disabling unused services:
- Press Windows Key + R and type “services.msc”
- Review running services
- Disable non-essential services like:
- Print Spooler (if not printing)
- Remote Registry
- Windows Search (if not needed)
- Set remaining services to “Manual” or “Automatic (Delayed Start)” where appropriate
Install Antivirus and Anti-Malware Software
While Windows Defender provides basic protection, consider enterprise solutions:
- Bitdefender GravityZone
- Kaspersky Endpoint Security
- ESET Server Security
- Malwarebytes for Windows Server
Enable Windows Defender if Using Built-in Protection
- Open “Windows Security” from Settings
- Ensure all protection areas show green checkmarks
- Configure scheduled scans
- Enable Cloud-delivered protection
- Turn on Automatic sample submission
Implement a Backup Strategy
Regular backups are essential for disaster recovery:
Windows Server Backup:
- Install Windows Server Backup feature via Server Manager
- Configure scheduled backups to external storage
- Test restore procedures regularly
Third-party backup solutions:
- Acronis Cyber Backup
- Veeam Backup
- CloudBerry Backup
Backup best practices:
- Follow the 3-2-1 rule (3 copies, 2 different media, 1 offsite)
- Automate backups to run during low-usage periods
- Encrypt backup data
- Regularly test restoration procedures
Change Default RDP Port
Moving RDP from port 3389 to a non-standard port reduces automated attacks:
- Open Registry Editor (regedit)
- Navigate to: HKEY_LOCAL_MACHINE\System\CurrentControlSet\Control\Terminal Server\WinStations\RDP-Tcp
- Find “PortNumber” and modify the value
- Convert your desired port from decimal to hexadecimal
- Update firewall rules to allow the new port
- Restart the server
Warning: Document your new port number carefully to avoid lockout.
Implement Account Lockout Policies
Protect against brute-force attacks:
- Open “Local Security Policy” (secpol.msc)
- Navigate to Account Policies > Account Lockout Policy
- Set “Account lockout threshold” to 5 invalid attempts
- Set “Account lockout duration” to 30 minutes
- Set “Reset account lockout counter after” to 30 minutes
Enable Automatic Security Updates
Ensure your server receives critical patches:
- Open “Settings” > “Update & Security”
- Click “Advanced options”
- Enable “Receive updates for other Microsoft products”
- Consider enabling “Restart this device as soon as possible”
Step 8: Optimize Server Performance
Maximize your VPS performance with these optimization techniques:
Disable Visual Effects
Server GUI visual effects consume unnecessary resources:
- Right-click “This PC” and select “Properties”
- Click “Advanced system settings”
- Under Performance, click “Settings”
- Select “Adjust for best performance”
- Keep only essential visual features checked
Configure Virtual Memory
Optimize paging file settings:
- Access “Advanced system settings” > “Performance Settings”
- Navigate to the “Advanced” tab
- Click “Change” under Virtual Memory
- Uncheck “Automatically manage paging file size”
- Set custom size (Initial: 1.5x RAM, Maximum: 3x RAM)
Optimize Power Settings
Ensure maximum performance:
- Open Control Panel > Power Options
- Select “High performance” plan
- Click “Change plan settings”
- Set “Turn off display” and “Put computer to sleep” to “Never”
Clean Up Disk Space
Remove unnecessary files regularly:
- Run Disk Cleanup (cleanmgr.exe)
- Select all file categories for cleanup
- Click “Clean up system files” for additional options
- Remove old Windows Update files
- Empty Recycle Bin
Schedule Maintenance Tasks
Use Task Scheduler for automated maintenance:
- Open Task Scheduler
- Create tasks for:
- Disk cleanup weekly
- Antivirus scans daily
- Backup verification
- Log file rotation
Step 9: Deploy Your Applications
With your server configured and secured, you’re ready to deploy applications.
Deploying Web Applications
For ASP.NET applications on IIS:
- Open IIS Manager
- Right-click “Sites” and select “Add Website”
- Enter site name and set physical path
- Configure binding (IP, port, hostname)
- Set application pool to appropriate .NET version
- Upload your application files via FTP or RDP
Publishing from Visual Studio:
- Right-click your project in Visual Studio
- Select “Publish”
- Choose “Web Server (IIS)”
- Enter your server details
- Configure authentication
- Click “Publish”
Configuring Database Connections
Ensure your application can connect to databases:
- Configure connection strings in web.config or app settings
- Create database users with appropriate permissions
- Enable remote connections if database is on another server
- Configure firewall rules for database ports
- Test connections before going live
Setting Up SSL/TLS Certificates
Secure your websites with HTTPS:
Using Let’s Encrypt (Free):
- Install win-acme from github.com/win-acme/win-acme
- Run the application and follow prompts
- Select your IIS site
- Choose validation method (HTTP validation recommended)
- Certificate automatically installs and renews
Using Purchased Certificates:
- Generate a Certificate Signing Request (CSR) in IIS
- Submit CSR to your Certificate Authority
- Download the issued certificate
- Import certificate in IIS Manager
- Bind certificate to your website
- Configure HTTPS redirection
Testing Your Deployment
Verify everything works correctly:
- Test all application functionality
- Check database connectivity
- Verify SSL certificate installation
- Test from different devices and networks
- Monitor error logs for issues
- Run performance tests under load
Step 10: Ongoing Maintenance and Monitoring
Server management is an ongoing process requiring regular attention.
Daily Monitoring Tasks
- Check server resource usage (CPU, RAM, disk)
- Review event logs for errors or warnings
- Verify backup completion
- Monitor website uptime and response times
- Check for unusual network activity
Weekly Maintenance Tasks
- Review and clear old log files
- Check disk space availability
- Review firewall logs for suspicious activity
- Test backup restoration on alternate system
- Update installed applications
Monthly Maintenance Tasks
- Review user accounts and permissions
- Audit security settings and policies
- Analyze performance trends
- Review and optimize database performance
- Check for and install software updates
- Test disaster recovery procedures
Monitoring Tools and Solutions
Implement comprehensive monitoring:
Built-in Windows Tools:
- Performance Monitor for real-time metrics
- Event Viewer for system logs
- Resource Monitor for detailed resource analysis
- Task Manager for quick overview
Third-party monitoring solutions:
- Nagios for infrastructure monitoring
- Zabbix for network and server monitoring
- PRTG Network Monitor
- SolarWinds Server & Application Monitor
Setting Up Alerts
Configure notifications for critical events:
- Use Task Scheduler to trigger alerts
- Set up email notifications for critical errors
- Configure SNMP traps for monitoring systems
- Implement SMS alerts for critical failures
- Use monitoring service webhooks for instant notifications
Common Issues and Troubleshooting
Even well-configured servers encounter problems. Here are solutions to common issues:
Cannot Connect via RDP
Possible solutions:
- Verify server is running (check provider’s console)
- Confirm IP address is correct
- Check firewall rules allow RDP (port 3389 or custom port)
- Ensure Remote Desktop is enabled on the server
- Verify network connectivity
- Try connecting from a different network
High CPU or Memory Usage
Diagnostic steps:
- Open Task Manager and identify resource-hungry processes
- Check for malware or crypto miners
- Review recently installed software
- Analyze IIS application pool performance
- Optimize database queries if applicable
- Consider upgrading VPS resources if consistently high
Website Not Accessible
Troubleshooting checklist:
- Verify IIS service is running
- Check website bindings in IIS Manager
- Confirm DNS records point to correct IP
- Review firewall rules for ports 80 and 443
- Check application pool status
- Review IIS logs for errors
- Verify SSL certificate is valid
Slow Performance
Performance improvement steps:
- Disable unnecessary startup programs
- Clean temporary files and logs
- Optimize virtual memory settings
- Check for disk errors (chkdsk)
- Disable unnecessary visual effects
- Review and optimize database indexes
- Consider CDN for static content delivery
Cannot Install Software
Common causes and fixes:
- Disable Internet Explorer Enhanced Security Configuration
- Run installer as Administrator
- Check for adequate disk space
- Verify software compatibility with Windows Server version
- Temporarily disable antivirus during installation
- Check Windows Update isn’t blocking installations
Advanced Configuration Options
Once comfortable with basic setup, explore advanced features:
Load Balancing
Distribute traffic across multiple servers:
- Configure Windows Network Load Balancing (NLB)
- Use hardware load balancers
- Implement application-level load balancing
- Consider cloud-based load balancing solutions
High Availability Setup
Minimize downtime with redundancy:
- Set up failover clustering
- Implement database replication
- Use shared storage solutions
- Configure health monitoring and automatic failover
Containerization with Docker
Run applications in isolated containers:
- Install Docker Desktop for Windows
- Create Dockerfiles for your applications
- Use Docker Compose for multi-container applications
- Deploy containers with orchestration tools
Automation with PowerShell
Automate repetitive tasks:
# Example: Automated backup script
$backupPath = "C:\Backups"
$timestamp = Get-Date -Format "yyyyMMdd_HHmmss"
$destination = "$backupPath\Backup_$timestamp"

# Create backup directory
New-Item -ItemType Directory -Path $destination

# Copy files
Copy-Item "C:\inetpub\wwwroot\*" -Destination $destination -Recurse

# Compress backup
Compress-Archive -Path $destination -DestinationPath "$destination.zip"

# Remove uncompressed folder
Remove-Item -Path $destination -Recurse
Remote Management with PowerShell Remoting
Manage your server from command line:
# Enable PowerShell Remoting
Enable-PSRemoting -Force

# Connect from another machine
$session = New-PSSession -ComputerName your_vps_ip -Credential Administrator

# Execute commands remotely
Invoke-Command -Session $session -ScriptBlock { Get-Service }
Cost Optimization Strategies
Maximize value from your Windows VPS investment:
Right-Size Your Server
- Monitor actual resource usage
- Downgrade if consistently underutilized
- Upgrade only when approaching limits
- Use auto-scaling if provider offers it
Optimize Storage
- Use compression for static files
- Implement log rotation policies
- Remove old backups regularly
- Consider object storage for large files
Reduce Bandwidth Costs
- Enable HTTP compression in IIS
- Implement browser caching
- Use CDN for static content
- Optimize images and media files
- Minimize API calls
Take Advantage of Reserved Instances
- Commit to longer terms for discounts
- Use reserved instances for predictable workloads
- Combine spot/on-demand for variable loads
Conclusion
Setting up a Windows VPS server requires careful planning and attention to security, but the process becomes straightforward when broken into manageable steps. You now have the knowledge to deploy, configure, secure, and maintain a production-ready Windows VPS server.
Key takeaways:
- Choose a reliable VPS provider with good performance and support
- Secure your server immediately with strong passwords, firewall rules, and updates
- Install only necessary software to minimize attack surface
- Implement comprehensive backup strategies
- Monitor your server regularly and respond to issues promptly
- Optimize performance and costs as your needs evolve
Remember that server management is an ongoing responsibility. Stay informed about security updates, regularly review your configuration, and continuously optimize based on your actual usage patterns.
Next Steps
Now that your Windows VPS is set up, consider:
- Implementing advanced monitoring and logging solutions
- Setting up automated deployment pipelines
- Exploring containerization for application isolation
- Configuring CDN for global content delivery
- Implementing automated backup verification
- Documenting your server configuration for team members
With your Windows VPS properly configured, you have a powerful platform for hosting websites, applications, databases, and development environments. Take time to familiarize yourself with Windows Server administration tools, and don’t hesitate to consult Microsoft documentation or community forums when you encounter challenges.
Your journey with Windows VPS hosting has just begun, and the skills you’ve gained will serve you well as you scale and optimize your infrastructure.
Frequently Asked Questions
Q: How much does a Windows VPS cost? A: Windows VPS pricing typically ranges from $10-30/month for basic plans to $100+/month for high-performance configurations. Costs vary by provider, resources, and licensing requirements.
Q: Is Windows VPS better than Linux VPS? A: Windows VPS is ideal for applications requiring Windows-specific technologies (ASP.NET, MSSQL, Active Directory). Linux VPS is generally cheaper and preferred for open-source stacks. Choose based on your application requirements.
Q: Can I upgrade my VPS resources later? A: Yes, most providers allow vertical scaling (more CPU, RAM, storage) with minimal downtime. Check your provider’s upgrade process and potential migration requirements.
Q: How do I backup my Windows VPS? A: Use Windows Server Backup, third-party backup software, or your provider’s snapshot feature. Implement the 3-2-1 backup strategy for best protection.
Q: What’s the difference between Windows Server and Windows 10/11? A: Windows Server is designed for server workloads with enhanced security, stability, and support for server roles like IIS, Active Directory, and remote access for multiple users.
Q: Do I need Windows Server licenses? A: Most VPS providers include Windows Server licensing in their pricing. Verify what’s included with your plan to avoid unexpected costs.
Q: How secure is a Windows VPS? A: Security depends on your configuration. Follow best practices: use strong passwords, enable firewall, install updates regularly, implement backup strategies, and monitor for suspicious activity.
Q: Can I run multiple websites on one Windows VPS? A: Yes, IIS supports hosting multiple websites on a single server using host headers, different ports, or IP addresses. Resource requirements depend on traffic and application complexity.